
Diagramming hints and tips
We have designed Elements to be quick and easy to use in live workshops. But it also has some extremely powerful features. The trick to balance simplicity with power. So here are some Diagramming hints & tips. 5 mins now to can save you hours later.
In EDIT mode, the palette on the left allows you to drag and drop. Or close the panel (icon on top bar) and use the following tips:
Activity boxes:
Double-click to draw boxes. Double click on box to edit text. TIP : Ctrl-Double-click to draw a box with a line flowing into it.
To link activity boxes or draw lines:
Rollover an activity box (don’t click) and ‘x’ handles appear on the edge.
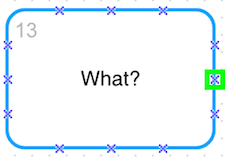 click and drag a line from the highlighted handle …
Select ‘Add Activity’, terminator or connector Want to explore connectors in more detail… or left click on the canvas to leave a floating line. To link existing boxes, drag the end of line into another activity box or to a specific anchor point to link.
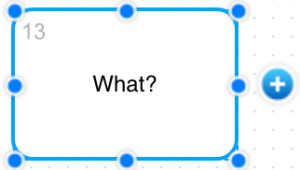
Another way to drag a line and add an activity box is to first to select an existing box. Click on the ‘+’, then drag and let go and then select “Add activity”.
TIP : To reverse the direction of the line; (arrow flows into the box) – Hold Ctrl/cmd down when you click and drag from an activity box handle or ‘+’
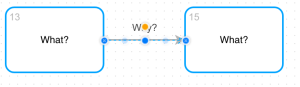
Line text:
Double click on line text to edit. Select the orange dot: click and drag to move.
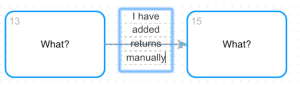
Note: line text does NOT auto-wrap and cannot be sized by dragging. You need to put in (or remove) any returns manually.
Drill downs
Drill down: Right click and select “Add drilldown”. This creates a new Diagram which is the ‘Child Diagram’ of this Activity box. 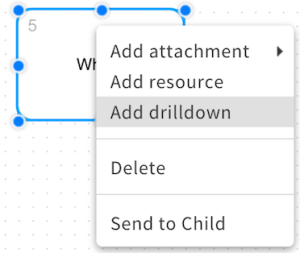
To delete a drill-down, right-click on the ‘drill-down’ corner (top-left of box). Deleted drilldowns are saved as a map in Deleted Maps folder. Access via ‘Maps’ window under Process menu option in Elements Home App (separate tab).
Resources:
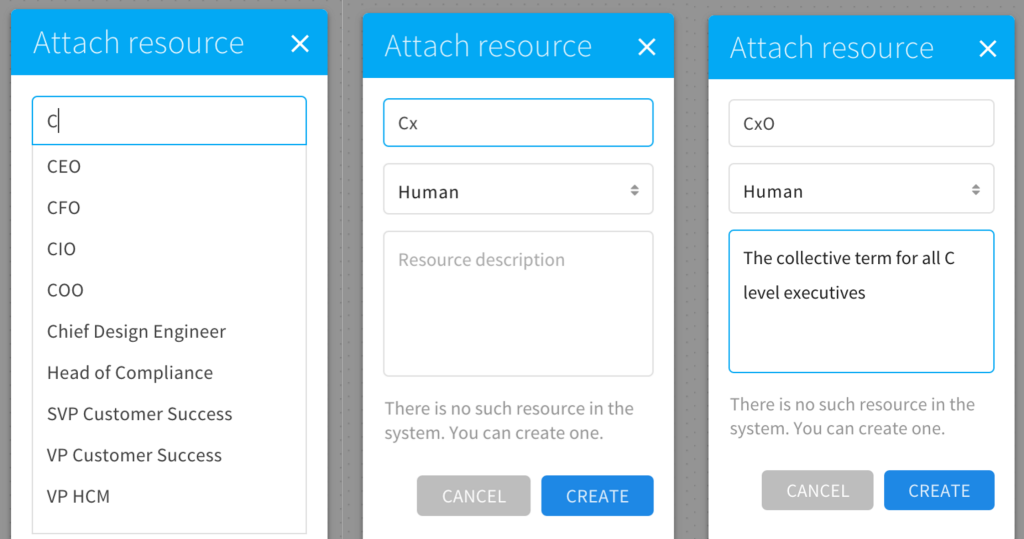
You can add single or multiple resources to an Activity box. Right-click and select “Add resource”. Type the name of the resource in the search box to see list of available resources. If the resource does not exist select the type of resource [ human / facility / system and hit “CREATE”.
WARNING: Resources you create are visible to all users in THE CURRENT Space. If you have Resource Management rights, you can manage the current Space’s resources in the Elements Home app. If you have Edit rights on the current Space, you can create Resources but not edit the existing library. Only you can create and edit resources in your Personal Space. Want to explore in more detail…
To delete a resource, roll-over it and click on the ‘x’. To reorder the resources just click and drag.
Attachments:
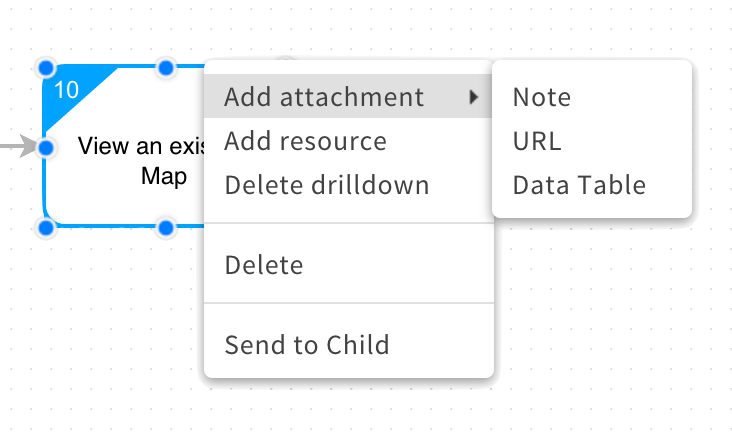 Right click and select “Add attachment”:
– Notes (simple rich text notes)
– URL (link to documents, websites, video)
– Data Tables. Want to explore in more detail…
You can pick from existing Data tables. New strctured Data Table forms can only be added once created in the Elements Home app. Want to explore in more detail…
To delete an attachment, click on paperclip and click on the ‘x’
Free text:
Alt-double click in space. Double click to edit. Note If you’re on a tablet, this is the only thing you really need to open the left panel for. You can then click and drag from the left panel onto the canvas with your finger or stylus.
Stickies
Shift-double click in space. Double click to edit. Change the style of the text in the right panel. Right mouse click to change the colorNote If you’re on a tablet, this is the only thing you really need to open the left panel for.
Alignment and Sizing
When you drag activities to move them, alignment guides will automatically appear in the canvas. Alternatively you can highlight multiple activities and use the ‘align and distribute’ icon on the top bar to quickly tidy up diagrams. Want to explore in more detail…